How to check car relays? Automotive relays buy
Automotive relays are an important part of a car's electrical system and are responsible for controlling the on/off switching of devices such as lights, fans, horns, fuel pumps, and more. However, due to the complexity of the car's working environment and the wear and tear of long-term use, the relays may malfunction, causing the devices to not work properly. Therefore, learning to check the status of car relays is a very practical skill for car owners and repairers.
➡️ Automotive relays buy
As a professional electronic components company, MobikeChip is committed to providing customers with high-quality electronic components and technical support. This article will provide you with detailed information on how to check car relays, help you quickly determine whether the relay is working properly, and provide some practical maintenance suggestions.
The role of automotive relays and common failures
1. The role of automotive relays
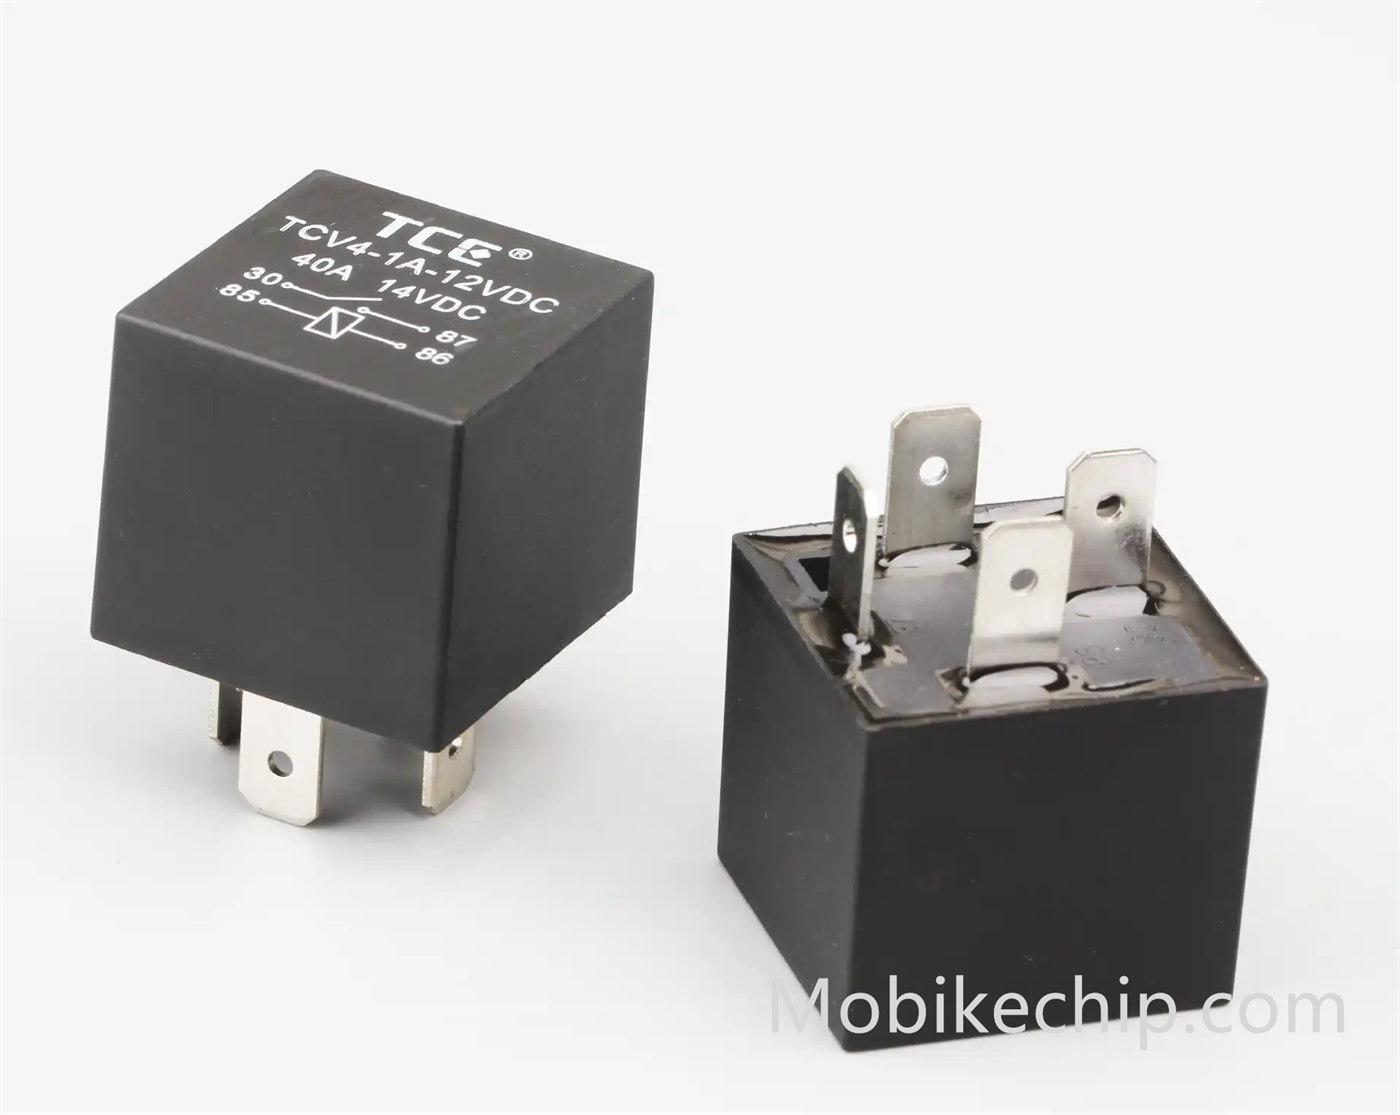
Automotive relays are electromagnetic switches that control large currents through small currents to protect circuit switches and extend equipment life. For example, when you press the horn button, the relay will turn on the horn circuit and make it sound.
2. Common Faults
Coil failure: The coil is broken or short-circuited, resulting in the relay not being able to engage.
Contact failure: oxidized, burned or sticking contacts, resulting in the circuit not being able to open and close properly.
Mechanical failure: spring failure or mechanical parts wear, resulting in the relay can not work properly.
Preparation of tools for checking automotive relays
Before checking the auto relay, you need to prepare the following tools:
Digital multimeter: for measuring coil resistance and contact on/off.
12V DC power supply: Used to simulate the car power supply and test the relay suction.
Connecting wire and clip: for connecting the circuit.
Screwdriver: for disassembling the relay or related parts.
It is also necessary to know the pin definition of the relay. Usually, the pins of automotive relays are labeled on the coil and contacts, e.g., “85” and “86” for coil pins, “30” for common contacts, “87” for common contacts, and “90” for common contacts. “87” indicates a normally open contact and ‘87a’ indicates a normally closed contact (if any).
Steps for checking automotive relays
1. Check coil resistance
Set the multimeter to resistance measurement (usually Ω) and touch the coil pins (usually 85 and 86) of the relay with the meter pen. Under normal conditions, the coil resistance value should be between tens of ohms and hundreds of ohms. If the resistance value is infinity, the coil is disconnected; if the resistance value is zero, the coil is shorted. Both conditions indicate that the relay is damaged.
2. Check contact continuity
Normally closed contacts (87a) test: set the multimeter to resistance measurement, use the pen to contact “30” and “87a” pins. When not energized, the resistance value of the normally closed contacts should be close to zero; after energized, the resistance value should be infinity.
Normally open contacts (87) test: with the pen contact “30” and “87” pins. When not energized, the resistance value of the normally open contact should be infinite; after energized, the resistance value should be close to zero.
If the test result is not consistent with the above, it means that the contacts may be oxidized or damaged, and the relay needs to be replaced.
3. Test relay absorption
Connect the 12V DC power supply to the coil pins (85 and 86) of the relay, and observe whether the relay is absorbed or not (hear the “click” sound). If the relay does not engage, the coil or a mechanical part may be damaged. 4.
4. Check the operating voltage of the relay
Connect a DC power supply to the coil pins of the relay and gradually increase the voltage until the relay is engaged. At this time, the voltage value displayed by the multimeter is the operating voltage of the relay. If the difference between the action voltage and the nominal value is large, it means that the relay has poor performance.
Check the notes of the automotive relay
Safety first: Before checking the relay, be sure to disconnect the power supply of the car to avoid electric shock or short circuit.
Correctly identify the pins: The pin definitions of different models of relays may be different, be sure to refer to the manual or logo of the relay.
Avoid short-circuiting: During testing, make sure the connecting wires are properly connected to avoid short-circuiting and damaging the relay or other equipment.
Regular maintenance: Check relays and their connecting wires regularly to ensure they are in good condition.
➡️ Automotive relays buy
Conclusion
With the above steps, you can easily check the status of automotive relays and quickly determine whether they are working properly. As a key component in the automotive electrical system, the performance of the relay directly affects the normal operation of the vehicle. Therefore, it is very necessary to check and maintain the relays regularly.
MobikeChip always strives to provide customers with high quality electronic components and solutions. If you encounter any problems when checking or using relays, please feel free to contact us and we will be happy to provide you with technical support and service!


Comments
Post a Comment